Run docker images locally with minikube

Building docker images locally and running them on minikube locally

I’d like to share 2 tricks with you for locally testing docker images.

This post is docker focused.

Trick 1:

docker-compose

Pre requisites:

Lean on docker-compose for your local building and tagging of images.

When you think docker-compose you’re probably thinking that you can run your images locally as containers and test them locally.

However docker-compose can also be very useful to build and tag images locally:

Example:

Create a file called: Dockerfile

Add the following contents to the file:

1
2
FROM nginx:latest
EXPOSE 80

That’s it, we’ll test using this simple nginx image.

Create a file called: docker-compose.yaml

Add the following contents to the file:

1
2
3
4
5
6
7
version: "3.9"
services:
  nginx:
    image: localtest:v0.0.1
    build: .
    ports:
      - "80:80"

Run with docker-compose

1
$ docker-compose up -d

You can check that your container is running:

1
$ docker ps

Now check your images

1
$ docker images

You should now see your image built and tagged and available locally:

1
2
3
REPOSITORY   TAG       IMAGE ID         CREATED          SIZE
localtest       v0.0.1    a1dcd6663272   xxx        133MB
nginx           latest    6084105296a9   xxx             133MB

Now you can view this in your browser:

Go to: http://localhost:80

Trick 2:

minikube

Pre requisites:

Running this locally built image on minikube.

Let’s get your local environment ready to run the image on minikube.

Make sure your minikube is running:

1
$ minikube status

Run this command

1
$ eval $(minikube docker-env)

Run the container

1
$ kubectl run localtest --image=localtest:v0.0.1 --image-pull-policy=Never

View pods:

1
$ kubectl get pods

You should see your pod creating and running:

1
2
NAME        READY   STATUS              RESTARTS   AGE
localtest   0/1     ContainerCreating   0          4s
1
2
NAME        READY   STATUS    RESTARTS   AGE
localtest   1/1     Running   0          27s

If you don’t see that, don’t forget to check you ran “eval $(minikube docker-env)”.

Can you create a deployment.yaml file and run it? Sure! Just add the imagePullPolicy as Never:

Create a file called: deployment.yaml

Add the following contents to the file:

1
2
3
4
5
6
7
8
9
10
11
12
13
14
15
16
17
18
19
20
21
22
apiVersion: apps/v1
kind: Deployment
metadata:
  labels:
    app: localtest
  name: localtest
spec:
  replicas: 1
  selector:
    matchLabels:
      app: localtest
  template:
    metadata:
      labels:
        app: localtest
    spec:
      containers:
      - image: localtest:v0.0.1
        name: localtest
        imagePullPolicy: Never
        ports:
        - containerPort: 80

Create the deployment on minikube (remember to check you’re connected to your minikube cluster):

1
$ kubectl apply -f deployment.yaml
1
$ kubectl get deployment,pod
1
2
3
4
5
6
NAME                        READY   UP-TO-DATE   AVAILABLE   AGE
deployment.apps/localtest   1/1     1            1           63s

NAME                             READY   STATUS    RESTARTS   AGE
pod/localtest                    1/1     Running   0          14m
pod/localtest-55888c9fc7-j8mkx   1/1     Running   0          63s

Your pod will have a different name to “localtest-6c755dd5d-m4g5l“, remember to copy your pod and replace this value with your pod’s value.

You can test your newly deployed container:

1
$ kubectl port-forward localtest-6c755dd5d-m4g5l 8080:80

Except this time we’ve portforwarded to port 8080

Go to: http://localhost:8080

(This was a bonus tip ^ you can test pods with port-forward without a service).

References:

Some other references

https://minikube.sigs.k8s.io/docs/commands/docker-env/

https://kubernetes.io/docs/concepts/containers/images/#updating-images

https://medium.com/bb-tutorials-and-thoughts/how-to-use-own-local-doker-images-with-minikube-2c1ed0b0968

.Net Core 2.1 TDD HttpClient and Http Requests Testing

.Net Core TDD – HttpClient and Http Requests Testing

Note: Using .net core 2.1

Using XUnit, but the concepts will remain the same no matter what testing framework you use.

Using Moq:

https://github.com/Moq/moq4/wiki/Quickstart

https://documentation.help/Moq/

There is also a really great free moq course here:

https://www.udemy.com/moq-framework

Tip:

Become familiar with Dependency Injection and Inversion Control in code so you can mock behaviour in tests.
Then become familiar with mocking in tests and assert behaviour based on mocked data or methods.

You can see working code here:

Github code:

https://github.com/CariZa/XUnit-Test-Samples

https://github.com/CariZa/XUnit-Test-Samples/blob/master/HTTPRequestsTests/RequestsTests.cs

HTTP Testing

Make use of dependency injection and inversion of control by creating a, HttpClient Handler.

HttpClient Handler

This handler will allow us to mock the behaviour of the HttpClient when we write out tests.

Interface (IHttpClientHandler.cs):

1
2
3
4
5
6
7
8
9
10
11
12
13
14
using System;
using System.Net.Http;
using System.Threading.Tasks;

namespace HTTPRequests
{
    public interface IHttpClientHandler
    {
        HttpResponseMessage Get(string url);
        HttpResponseMessage Post(string url, HttpContent content);
        Task<HttpResponseMessage> GetAsync(string url);
        Task<HttpResponseMessage> PostAsync(string url, HttpContent content);
    }
}

Class (HttpClientHandler.cs):

1
2
3
4
5
6
7
8
9
10
11
12
13
14
15
16
17
18
19
20
21
22
23
24
25
26
27
28
29
30
31
using System;
using System.Net.Http;
using System.Threading.Tasks;

namespace HTTPRequests
{
    public class HttpClientHandler : IHttpClientHandler
    {
        private HttpClient _client = new HttpClient();

        public HttpResponseMessage Get(string url)
        {
            return GetAsync(url).Result;
        }

        public async Task<HttpResponseMessage> GetAsync(string url)
        {
            return await _client.GetAsync(url);
        }

        public HttpResponseMessage Post(string url, HttpContent content)
        {
            return PostAsync(url, content).Result;
        }

        public async Task<HttpResponseMessage> PostAsync(string url, HttpContent content)
        {
            return await _client.PostAsync(url, content);
        }
    }
}

Requests

Create a Requests class for your http requests and inject the handler:

1
2
3
4
5
6
7
8
9
10
11
12
13
14
15
16
17
18
19
20
21
22
23
24
25
26
27
28
29
30
31
32
33
34
35
36
37
38
39
40
41
42
43
44
45
46
47
48
49
50
51
52
53
54
55
56
57
58
using System;
using System.Collections.Generic;
using System.Net.Http;
using System.Threading.Tasks;
using Newtonsoft.Json;

namespace HTTPRequests
{
    public class Requests
    {
        private readonly IHttpClientHandler _httpClient;

        public Requests(IHttpClientHandler httpClient) {
            _httpClient = httpClient;
        }

        public async Task<string> GetData(string baseUrl)
        {

            IHttpClientHandler client = _httpClient;
     
            using (HttpResponseMessage res = await client.GetAsync(baseUrl))
            try
            {
                using (HttpContent content = res.Content)
                {
                    string data = await content.ReadAsStringAsync();
                    if (data != null)
                    {
                        return data;
                    }
                    else
                    {
                        return "err no data";
                    }
                }
            }
            catch (Exception e)
            {
                return "err no content";
            }

        }

        public async Task<List<TodoModel>> GetTodosByUserId(string url, int userId)
        {
            var task = GetData(url);

            List<TodoModel> todos = null;
            await task.ContinueWith((jsonString) =>
              {
                  todos = JsonConvert.DeserializeObject<List<TodoModel>>(jsonString.Result);
                  todos = todos.FindAll(x => x.userId == userId);
              });
            return todos;
        }
    }
}

Use it in your code:

Using the above Requests class in action:

1
2
3
    Requests req = new Requests(new HttpClientHandler());
    string todoItem = req.GetData("https://jsonplaceholder.typicode.com/todos/1").Result;
    List<TodoModel> todos = req.GetTodosByUserId("https://jsonplaceholder.typicode.com/todos", 1).Result;

Writing tests

Testing the Http Requests using dependency injection and inversion of control:

1
2
3
4
5
6
7
8
9
10
11
12
13
14
15
16
17
18
19
20
21
22
23
24
25
26
27
28
29
30
31
32
33
34
35
36
37
38
39
40
41
42
43
44
45
46
47
48
49
50
51
52
53
54
55
56
57
58
59
60
61
62
63
64
65
66
67
68
69
70
71
72
73
74
75
76
77
78
79
80
81
82
83
84
85
86
87
88
89
90
91
92
93
94
95
using System;
using System.Net;
using System.Net.Http;
using System.Threading.Tasks;
using HTTPRequests;
using Moq;
using Xunit;
using Newtonsoft.Json;

namespace HTTPRequestsTests
{

    public class RequestsTests //: IClassFixture<RequestsTestsFixture>
    {
        [Fact]
        public void GetData_CheckGetAsyncIsCalled()
        {
            // Arrange/Setup
            //var moqRes = new Mock<HttpResponseMessage>();
            var moqHttp = new Mock<HTTPRequests.IHttpClientHandler>();
            moqHttp.Setup(HttpHandler => HttpHandler.GetAsync(It.IsAny<string>()))
                   .Returns(() => Task.FromResult(new HttpResponseMessage(HttpStatusCode.OK)));
            var req = new Requests(moqHttp.Object);
            var url = "testurl";

            // Act
            var todo = req.GetData(url);

            // Assert
            moqHttp.Verify(moqHttpInst => moqHttpInst.GetAsync(It.IsAny<string>()), Times.Exactly(1));
        }

        [Fact]
        public void GetData_CheckGetAsyncIsCalled_EmptyContent()
        {
            // Arrange/Setup
            var response = new HttpResponseMessage( HttpStatusCode.OK );
            var moqHttp = new Mock<HTTPRequests.IHttpClientHandler>();
            moqHttp.Setup(HttpHandler => HttpHandler.GetAsync(It.IsAny<string>()))
                   .Returns(() => Task.FromResult(response) );
            var req = new Requests(moqHttp.Object);
            var url = "testurl";

            // Act
            var todo = req.GetData(url);
            Console.WriteLine("Ending here after expection");

            // Assert
            Assert.True(todo.IsCompleted);

        }

        [Fact]
        public void GetData_CheckGetAsyncIsCalled_ReturnsString()
        {
            // Arrange/Setup

            // Content = new StringContent(SerializedString, System.Text.Encoding.UTF8, "application/json")
            var response = new HttpResponseMessage(HttpStatusCode.OK) { Content = new StringContent("Content here 123") };
            var moqHttp = new Mock<HTTPRequests.IHttpClientHandler>();
            moqHttp.Setup(HttpHandler => HttpHandler.GetAsync(It.IsAny<string>()))
                   .Returns(() => Task.FromResult(response));
            var req = new Requests(moqHttp.Object);
            var url = "testurl";

            // Act
            var todo = req.GetData(url);
            Console.WriteLine(todo.Result);

            //
            Assert.Equal("Content here 123", todo.Result);
        }

        [Fact]
        public void GetData_CheckGetAsyncIsCalled_ReturnsJSON()
        {
            // Arrange/Setup
            var mockJson = "{"GroupId":1,"Samples":[{"SampleId":1},{"SampleId":2}]}";
            var JSONContent = new StringContent(mockJson, System.Text.Encoding.UTF8, "application/json");
            var response = new HttpResponseMessage(HttpStatusCode.OK) { Content = JSONContent };
            var moqHttp = new Mock<HTTPRequests.IHttpClientHandler>();
            moqHttp.Setup(HttpHandler => HttpHandler.GetAsync(It.IsAny<string>()))
                   .Returns(() => Task.FromResult(response));
            var req = new Requests(moqHttp.Object);
            var url = "testurl";

            // Act
            var todo = req.GetData(url);
            Console.WriteLine(todo.Result);

            // Assert
            Assert.Equal(mockJson, todo.Result);
        }
    }
}

.Net Core 2.1 TDD Database Requests

.Net Core TDD Databases

Note: This is using .net core 2.1

Using XUnit, but the concepts will remain the same no matter what testing framework you use.

Using Moq:

https://github.com/Moq/moq4/wiki/Quickstart

https://documentation.help/Moq/

There is also a really great free moq course here:

https://www.udemy.com/moq-framework

Tip:

Become familiar with Dependency Injection and Inversion Control in code so you can mock behaviour in tests.
Then become familiar with mocking in tests and assert behaviour based on mocked data or methods.

Github repo:

You can see working code here

https://github.com/CariZa/XUnit-CRUD-Example
https://github.com/CariZa/XUnit-CRUD-Example/tree/master/CRUD_Tests

Database Mocking in .net core

Models

Types of tests you could write to test a model:

Test a model can be created by creating an instance and testing the fields have been added to the model instance.

1
2
3
4
5
6
7
8
9
10
11
12
13
14
15
16
17
18
19
20
[Fact]
public void BookModel_Instantiates()
{
            string book = "Harry Potter";
            string author = "JK Rowling";
            string isbn = "123234345";

            Book bookInst = new Book() {
                Name = book,
                Author = author,
                ISBN = isbn
            };

            Assert.Matches(bookInst.Name, book);
            Assert.Matches(bookInst.Author, author);
            Assert.Matches(bookInst.ISBN, isbn);

            // Check no validation errors
            Assert.False(ValidateModel(bookInst).Count > 0);
}

Validate using ValidateModel

Test validations for models using ValidateModel:

1
2
3
4
5
6
7
8
9
10
11
12
13
14
15
16
17
18
19
20
21
22
23
24
25
26
27
28
29
30
        [Fact]
        public void BookModel_RequiresNameField()
        {
            string author = "JK Rowling";
            string isbn = "123234345";

            Book bookInst = new Book()
            {
                Author = author,
                ISBN = isbn
            };

            var invalidFields = ValidateModel(bookInst);

            // Validation errors should return
            Assert.True(invalidFields.Count > 0);
        }

        [Fact]
        public void BookModel_DoesNotRequireOtherFields()
        {
            string book = "Harry Potter";
            Book bookInst = new Book()
            {
                Name = book
            };

            var invalidFields = ValidateModel(bookInst);
            Assert.False(invalidFields.Count > 0);
        }

Validation Helper:

Also use this Helper method for the validation checks:

1
2
3
4
5
6
7
8
9
        // Validation Helper
        private IList<ValidationResult> ValidateModel(object model)
        {
            var validationResults = new List<ValidationResult>();
            var ctx = new ValidationContext(model, null, null);
            Validator.TryValidateObject(model, ctx, validationResults, true);
            if (model is IValidatableObject) (model as IValidatableObject).Validate(ctx);
            return validationResults;
        }

CRUD tests:

Following the 3 step approach: Arrange, Assert, Act.

Some tips:

You need a builder (DbContextOptionsBuilder), and a context. Your arrange will look something like this:

// Arrange
var builder = new DbContextOptionsBuilder().UseInMemoryDatabase(databaseName: “InMemoryDb_Edit”);
var context = new ApplicationDbContext(builder.Options);
Seed(context);

Create a Seed helper method:

1
2
3
4
5
6
7
8
9
10
11
12
        private void Seed(ApplicationDbContext context)
        {
            var books = new[]
            {
                new Book() { Name = "Name1", Author = "Author1", ISBN = "moo1", Id = 1},
                new Book() { Name = "Name2", Author = "Author2", ISBN = "moo2", Id = 2},
                new Book() { Name = "Name3", Author = "Author3", ISBN = "moo3", Id = 3}
            };

            context.Books.AddRange(books);
            context.SaveChanges();
    }

Create a Teardown helper method:

1
2
3
4
5
6
        private async Task Teardown(ApplicationDbContext context)
        {
            var books = await context.Books.ToListAsync();
            context.Books.RemoveRange(books);
            context.SaveChanges();
         }

Check you can Create, Update and Delete models from a database instance.

Using InMemoryDatabase:

Create example:

1
2
3
4
5
6
7
8
9
10
11
12
13
14
15
16
17
18
19
20
21
22
23
24
25
        [Fact]
        public async System.Threading.Tasks.Task Create_OnPost_BookShouldBeAddedAsync()
        {
            // Arrange
            var builder = new DbContextOptionsBuilder<ApplicationDbContext>().UseInMemoryDatabase(databaseName: "InMemoryDb_Create");
            var context = new ApplicationDbContext(builder.Options);
            Seed(context); // See above for this Helper Method

            // Act
            var model = new CreateModel(context);

            var book = new Book()
            {
                Name = "NameTest",
                ISBN = "ISBNTest",
                Author = "AuthorTest"
            };

            await model.OnPost(book);

            // Assert
            var books = await context.Books.ToListAsync();
            Assert.Equal(4, books.Count);
            Assert.Matches(books[3].Name, "NameTest");
        }

Read example:

1
2
3
4
5
6
7
8
9
10
11
12
13
14
15
16
17
18
19
20
21
        [Fact]
        public async void Index_OnGet_BooksShouldSet()
        {
            // Arrange
            var builder = new DbContextOptionsBuilder<ApplicationDbContext>()
                .UseInMemoryDatabase(databaseName: "InMemoryDb_Index");
            var mockAppDbContext = new ApplicationDbContext(builder.Options);

            Seed(mockAppDbContext);

            var pageModel = new IndexModel(mockAppDbContext);

            // Act
            await pageModel.OnGet();

            // Assert
            var actualMessages = Assert.IsAssignableFrom<List<Book>>(pageModel.Books);
            Assert.Equal(3, actualMessages.Count);

            await Teardown(mockAppDbContext);
}

Update example:

1
2
3
4
5
6
7
8
9
10
11
12
13
14
15
16
17
18
19
20
21
22
23
24
25
26
27
28
29
30
        [Fact]
        public async void Edit_OnGet_EditBookEntryIfValid()
        {
            // Arrange
            var builder = new DbContextOptionsBuilder<ApplicationDbContext>().UseInMemoryDatabase(databaseName: "InMemoryDb_Edit");
            var context = new ApplicationDbContext(builder.Options);
            Seed(context);

            // Act
            var editPage = new EditModel(context);
            editPage.OnGet(2);

            editPage.Book.Author = "Test2";
            editPage.Book.ISBN = "Test2";
            editPage.Book.Name = "Test2";

            await editPage.OnPost();

            var books = await context.Books.ToListAsync();

            // Assert
            Assert.Equal(editPage.Book, books[1]);
            Assert.Matches(books[1].Name, "Test2");
            Assert.Matches(books[1].ISBN, "Test2");
            Assert.Matches(books[1].Author, "Test2");

            Assert.Matches(editPage.Message, "Book has been updated successfully");

            await Teardown(context);
        }

Delete example:

1
2
3
4
5
6
7
8
9
10
11
12
13
14
15
16
17
18
19
20
21
22
23
24
25
26
        [Fact]
        public async void Index_OnPostDelete_BookGetsDeleted()
        {
            // Arrange
            var builder = new DbContextOptionsBuilder<ApplicationDbContext>()
                .UseInMemoryDatabase(databaseName: "InMemoryDb_Index");
            var mockAppDbContext = new ApplicationDbContext(builder.Options);

            Seed(mockAppDbContext);

            var pageModel = new IndexModel(mockAppDbContext);

            // Act
            var deleteBooks = await mockAppDbContext.Books.ToListAsync();
            await pageModel.OnPostDelete(deleteBooks[1].Id);


            var books = await mockAppDbContext.Books.ToListAsync();

            // Assert
            Assert.Equal(2, books.Count);

            Assert.Matches(pageModel.Message, "Book deleted");

            await Teardown(mockAppDbContext);
        }

Create a Digital Ocean droplet with Terraform

Infrastructure as code

I’ve been meaning to try out terraform. It gives you the power to define your infrastructure with code. It plugs in with all major cloud providers. Here’s some links below:

https://www.terraform.io/
https://www.terraform.io/docs/providers/index.html

For simplicity sake I played around with terraform and digitalocean.
https://www.terraform.io/docs/providers/do/index.html

A couple things you have to just setup on digital ocean:

  • Add your ssh key to digital ocean – copy the name of your ssh key, paste it somewhere for reuse
  • Create a digital ocean api token – copy the token, paste it somewhere for reuse

Install terraform and make sure you can run the “terraform” command. (On mac, I had to move the install to /usr/local/bin/ ) https://www.terraform.io/intro/getting-started/install.html

Check terraform can be run correctly:

1
$ terraform -v

Setup main.tf file

I’ve put together this script, save it as main.tf in a new folder

Setup environment variables and run commands

You need to set up 2 environment variables. Use the two copied values from above:

1
2
export DOTOKEN="YOUR_DIGITAL_OCEAN_API_TOKEN_HERE"
export SSHKEYNAME="SSH_KEY_NAME_FROM_DIGITAL_OCEAN"

Test the values are correct:

1
2
echo $DOTOKEN
echo $SSHKEYNAME

Run the following commands:

1
2
3
4
$ terraform init
$ terraform plan -var="do_token=$DOTOKEN" -var="ssh_key_name=$SSHKEYNAME"
   - Output will end with: Plan: 1 to add, 0 to change, 0 to destroy.
$ terraform apply -var="do_token=$DOTOKEN" -var="ssh_key_name=$SSHKEYNAME"

If you get any authentication errors, make sure you have set up your ssh key with your computer’s public key.

After the “apply” command you’ll see an ip.

1
2
3
Outputs:

controller_ip_address = 127.0.0.1

(127.0.0.1 is just a placeholder ip value, you’ll get a different value which you can use)

ssh into the new server

Then, because we supplied the ssh key name, the new server will have our ssh key set up already.

You can ssh into the server using the ip displayed:

You now have an ubuntu droplet to play around with. When you’re done, just run the “destroy” command below:

1
$ terraform destroy -var="do_token=$DOTOKEN" -var="ssh_key_name=$SSHKEYNAME"

You can do some great things with terraform. You can spin up multiple servers to practice distributed systems. You can add chef into the mix and make sure the right software is setup on the servers in preparation for code.

You might then want to install a container orchestrator like kubernetes or swarm, then run yaml scripts. And automate it all via ansible, jenkins, gitlab etc. The possibilities are endless 🙂

Keep swimming…

Here’s a link for using chef with terraform:

https://www.terraform.io/docs/provisioners/chef.html

TDD React, Jest, Enzyme

I’ve started working on creating github pages to document the TDD process I go through. I’m trying to map out the thinking and step by step show how TDD can become a fluent process while you’re developing.

First attempt at documenting TDD is with React. I’ve had great success with a TDD approach for react components.

I’ll keep updating as I go, but here’s the start of it:

https://yeahshecodes.github.io/TDD-ReactJS/

Feel free to give as much feedback as you like. If you can see ways to improve the documentation I’m open to those thoughts 🙂

Kubernetes and Kong with a Kong Dashboard local

I quickly threw this together just to see if I could get it working on my local machine using docker for mac and kubernetes.

It’s pretty rough, but just putting it here in case anyone needs the same info I pulled together.

This is for local testing with NodePort, not for production or cloud use.
I also used postgres.

Kong kubernetes setup documentation here:

https://docs.konghq.com/install/kubernetes/

Steps to set up kong locally using kubernetes and docker for mac

Enable kubernetes with docker for mac

  • Click on docker preferences
  • Click on the Kubernetes tab
  • Select enable kubernetes checkbox and click on the kubernetes radio button

Note: Make sure kubernetes has access to internet, if it does not start up, check internet connection. If you run on a VPN that has strict security firewalls, that might be preventing kubernetes from installing.

Update type to NodePort

In order for kong to run locally you need to update the type from LoadBalancer to NodePort.

Also make sure the kong version you are using is supported by the kong dashboard image. At the time of writing this only kong version under 0.14 are supported. So I updated the version of kong to 0.13 in the yaml scripts.

Updated kong tag to 0.13

Yaml files

Grab the yaml files from here:

https://github.com/CariZa/kubernetes-kong-with-dashboard

Commands:

1
2
3
4
5
kubectl create -f postgres.yaml    

kubectl create -f kong_postgres.yaml

kubectl create -f kong_migration_postgres.yaml

Check the service ip for

1
kubectl get svc

Copy the ip of the kong-admin service and paste it in kong_dashboard.yml as an “args” value, eg:

When you run “$ kubectl get service” you might get this response:

1
2
3
4
    NAME               TYPE        CLUSTER-IP       EXTERNAL-IP   PORT(S)          AGE
    ...
    kong-admin         NodePort    10.101.71.20     <none>        8001:30916/TCP   46m
    ...

What you want to take is the CLUSTER-IP and the first part of the PORT(S)

1
10.97.55.180:8001

You will add it in the kong_dashboard.yaml file by the args list around line 34:

1
args: ["start", "--kong-url", "http://10.101.71.20:8001"]

Then create the kong-dashboard:

1
kubectl create -f kong_dashboard.yml

To check if your dashboard runs correctly check the logs.

First get the full pod name for kong-dashboard:

1
kubectl get pods

It will be something like **kong-dashboard-86dfddcfdf-qgnhl**

Then check the logs:

1
kubectl logs [pod-name]

eg

1
kubectl logs kong-dashboard-86dfddcfdf-qgnhl

You should see

1
2
3
4
5
    Connecting to Kong on http://10.101.71.20:8001 ...
    Connected to Kong on http://10.101.71.20:8001.
    Kong version is 0.13.1
    Starting Kong Dashboard on port 8080
    Kong Dashboard has started on port 8080

If you only see

1
    Connecting to Kong on http://10.101.71.20:8001

It might still be starting up or your internal kong-admin url could be incorrect. Remember the url is the kubernetes internal url.

Test the dashboard works

You should be able to access your kong-dashboard using the service port:

1
kubectl get service

Grab the port by the kong-dashboard service, it will be the second port:

1
2
3
4
NAME               TYPE        CLUSTER-IP       EXTERNAL-IP   PORT(S)          AGE
...
kong-dashboard     NodePort    10.97.55.180     <none>        8080:30719/TCP   1h
...

In this case the port value is 30719

So the url will be:

http://localhost:30719

Note

This is for local testing with NodePort, not for production or cloud use.

Screenshots

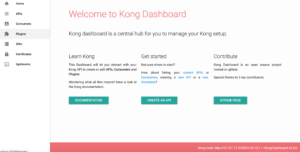
This is what I a see on my side at the date of publication:

I added a test api entry, pointed to a service I was running on kubernetes:

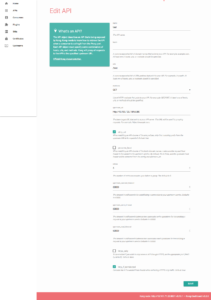
This is the settings I added for the test:

I got the url but checking the service value:

1
kubernetes get service

I get the values:

1
hello-kubernetes   NodePort    10.106.125.184   <none>        8080:30281/TCP   22h

I used “10.106.125.184” and “8080” as the “upsteam_url”

And I could then access the internal route using the kong-proxy ip and the path I set “/test”

Eg:

http://localhost:32246/test

localhost:32246 -> Kong Proxy url
/test -> The path I told the kong_dashboard to use and redirect to the internal url “10.106.125.184:8080”

Elastic beats tutorial with docker

Elastic beats tutorial: A quick look at using elastic beats with docker containers

Creating a POC of elastic beats

I gave myself a single goal today: Get a working POC of elastic beats using an nginx container and a beats container. I wanted specifically to prove that I could create a loosely coupled container logging system using beats containers.

Here’s a quick overview of the POC:

Just a quick note, the files below are very particular about spaces/indentation used. If you get strange errors just check the spaces are correct. WordPress keeps removing my spaces, I think I’ve added them in now permanently, just make sure the right spacing and indentation is in your files.

Step 1: Beats

Setup the configuration of the metricbeat.

Create a new directory for you to save your configuration file:

1
$ mkdir practice-beats

Then create a file called “metricbeat.yml” and add this:

1
2
3
4
5
6
7
8
9
10
11
12
13
metricbeat.modules:
- module
: nginx
  metricsets
: ["stubstatus"]
  period
: 10s

  # Nginx hosts
  hosts
: ["my-awesome-nginx"]

  # Path to server status. Default server-status
  #server_status_path: "server-status"

output.console
:
  pretty
: true

The important parts are that we are using the nginx elastic beats module. And we are going to be watching for the my-awesome-nginx host (which we will create in step 2).

The other important part to note is we are mapping the output to the console:

1
2
output.console:
pretty: true

I’m mapping to the console/terminal for simplicity but you can map the output to something more useful like logstash or elasticsearch (I’ll do follow up posts on that process).

Run the following docker command to create the beats container:

1
2
3
docker run --name my-awesome-beats \
-v $(pwd)/metricbeat.yml:/usr/share/metricbeat/metricbeat.yml \
docker.elastic.co/beats/metricbeat:6.2.4

Beats will trigger the metricbeat request to nginx every 10 seconds.

You will see data like this appearing every 10 seconds:

1
2
3
4
5
6
7
8
9
10
11
12
13
14
15
16
17
18
19
20
21
22
{
"@timestamp": "2018-06-08T14:51:20.367Z",
"@metadata": {
"beat": "metricbeat",
"type": "doc",
"version": "6.2.4"
},
"metricset": {
"host": "my-awesome-nginx",
"rtt": 11910,
"name": "stubstatus",
"module": "nginx"
},
"error": {
"message": "error making http request: Get http://my-awesome-nginx/server-status: lookup my-awesome-nginx on 192.168.65.1:53: no such host"
},
"beat": {
"name": "7e29608de529",
"hostname": "7e29608de529",
"version": "6.2.4"
}
}

For now you will see this error:

1
WARN transport/tcp.go:36 DNS lookup failure "my-awesome-nginx": lookup my-awesome-nginx on 192.168.65.1:53: no such host

That’s ok, we just need to setup a custom network, which we’ll do in Step 3.

What you are seeing now is a working beat 🙂 It’s alive!

Step 2: Nginx

Lets create a nginx container with some configurations as well.

Leave the elastic beats terminal running, open a new terminal window and follow the following steps:

We need to edit the default nginx configuration and add an nginx module called “stubstatus”.

Useful links:

https://www.tecmint.com/enable-nginx-status-page/

https://nginx.org/en/docs/http/ngx_http_stub_status_module.html

(Just a note, in the above examples, the location for metricbeats needs to be “location /server-status”)

To do this we add this to the default.conf file.

Go out of your current directory and then create a new directory:

1
$ mkdir practice-nginx

Then in there create 2 files:
– default.conf
– index.html

The metricbeats module will be triggering on this endpoint: “/server-status” so we need to make sure that nginx puts the right information at the point by adding this:

1
2
3
4
5
...
location /server-status {
stub_status;
}
...

Copy and paste this configuration script to your default.conf file:

1
2
3
4
5
6
7
8
9
10
11
12
13
14
15
16
17
18
19
server {
    listen       80;
    server_name  localhost;

    location / {
        root   /usr/share/nginx/html;
        index  index.html index.htm;
    }

    location /server-status {
        stub_status;
    }

    error_page   500 502 503 504  /50x.html;
    location = /50x.html {
        root   /usr/share/nginx/html;
    }

}

Let’s create an index.html page with only the text “Hello world!”.

So if you are using a terminal you can just do this:

1
2
$ vi index.html
hello world

And save 🙂

Then run the following docker command to spin up an nginx container:

1
2
3
4
docker run --name my-awesome-nginx \
-v $(pwd)/index.html:/usr/share/nginx/html/index.html \
-v $(pwd)/default.conf:/etc/nginx/conf.d/default.conf \
-p 8010:80 -d nginx

What are we doing here?

–name lets us give the container we are about to spin up a name
-v here we are voluming a file, we use it twice to volume two files, index.html and default.conf
index.html is going in a location where nginx is expecting to find an index.html file
Inside the container it will be looking in the location /usr/share/nginx/
default.conf is the configuration file that nginx will use by default. it is located in the path /etc/nginx/conf.d/
-p here we are telling docker to map the port 8010 on our computer to the port 80 on the nginx container

If the docker command ran correctly you should be able to go to this url and see our hello world:

1
http://localhost:8010

You should see your Hello World!

We should also be able to check that our configuration change works by going here:

1
http://localhost:8010/server-status

You should see something like:

1
2
3
4
Active connections: 1
server accepts handled requests
133 133 191
Reading: 0 Writing: 1 Waiting: 0

Step 3: Network Beats container and the Nginx container

Next we need to create a custom user network. Let’s call it “catsandboots”.

There’s a little easter egg joke in that 😉 Hint: Ask Siri to beatbox.

To create our docker network we can run this command:

1
$ docker network create catsandboots

To add our nginx and beats containers to that network we can do this:

We named the two containers like this:
– my-awesome-beats
– my-awesome-nginx

We then need to run this docker command:

1
2
$ docker network connect catsandboots my-awesome-beats
$ docker network connect catsandboots my-awesome-nginx

To check they’re on the right network you can run:

1
$ docker inspect my-awesome-beats

and

1
$ docker inspect my-awesome-nginx

Alternatively you can inspect the network and go:

1
$ docker inspect catsandboots

If you go back to the terminal with the running elastic beats container (aka my-awesome-beats) then you should now start seeing:

1
2
3
4
5
6
7
8
9
10
11
12
13
14
15
16
17
18
19
20
21
22
23
24
25
26
27
28
29
30
31
32
33
{
"@timestamp": "2018-06-08T15:07:20.385Z",
"@metadata": {
"beat": "metricbeat",
"type": "doc",
"version": "6.2.4"
},
"metricset": {
"host": "my-awesome-nginx",
"rtt": 4574,
"name": "stubstatus",
"module": "nginx"
},
"nginx": {
"stubstatus": {
"current": 3,
"dropped": 0,
"writing": 1,
"waiting": 0,
"accepts": 2,
"requests": 3,
"hostname": "my-awesome-nginx",
"reading": 0,
"handled": 2,
"active": 1
}
},
"beat": {
"name": "7e29608de529",
"hostname": "7e29608de529",
"version": "6.2.4"
}
}

Your beats container is now receiving actual data from nginx via the nginx substatus module. Just in case you didn’t see this useful link above here it is again: https://nginx.org/en/docs/http/ngx_http_stub_status_module.html

You should now be seeing useful information like this:

1
2
3
4
5
6
7
8
9
10
11
12
13
"nginx": {
"stubstatus": {
"current": 3,
"dropped": 0,
"writing": 1,
"waiting": 0,
"accepts": 2,
"requests": 3,
"hostname": "my-awesome-nginx",
"reading": 0,
"handled": 2,
"active": 1
}

Done!

So that’s a quick tutorial to get an instance of elastic beats metricbeat running as a POC. There are a bunch of beats you can use, check out the documentation. I’m gonna try get a couple more tutorials out for some of the other beats. And also get a proper working elastic stack setup from container to beats to elasticsearch to kibana 🙂 Soon.

Docker tutorial for user-defined networks

How to get docker containers to communicate without using –link

A quick docker tutorial for user-defined networks to help you transition from using –link to user-defined networks.

If you have been trying to get docker containers to communicate with each other and you are investigating using the –link option, you made have come across this warning message:

Warning: The –link flag is a legacy feature of Docker. It may eventually be removed. Unless you absolutely need to continue using it, we recommend that you use user-defined networks to facilitate communication between two containers instead of using –link. One feature that user-defined networks do not support that you can do with –link is sharing environmental variables between containers. However, you can use other mechanisms such as volumes to share environment variables between containers in a more controlled way.

Source: https://docs.docker.com/network/links/#communication-across-links

Here is a quick way to get docker containers to communicate using docker networks.

Why should containers communicate?

The long term plan is to microservice your monolithic projects. Make them smaller, more testable, more reusable and more maintainable.

Once you have your collection of microservices, you might want to test that they can use other microservices, or communicate amongst each other.

In my case, I often spin up new tools to play around with in isolation. And I need those tools to communicate with other tools. This is where the docker network comes in handy.

Networking Like a Docker Boss

A better way to get containers to communicate is to create a user generated network.

The user being you, and the network will be a default bridge network.

The command to create a docker network:

1
$ docker network create [yournetworknamehere]

So you add in the name you would like to give your network, eg “mynet”.

1
$ docker network create mynet

Check your network is create by typing in:

1
$ docker networks ls

You should see something like this:

NETWORK ID NAME DRIVER SCOPE
851fb69ba4ca bridge bridge local
fc3d1eddc10f host host local
f7151c7835b8 mynet bridge local
9ba12ad3dcea none null local

You will see your new network “mynet” has been added and by default it is a bridge network.

That’s all we need to get containers communicating to each other.

Inspect the docker network

Check what is currently on the network by running

1
$ docker network inspect mynet

And have a look at the sections that says:

1
2
3
"Containers": {

}

If you just created your network, you should see an empty section called “Containers” near the bottom of the inspect response. This indicates that currently there are no containers on this network.

Add containers to your custom user network

Check which containers you need to communicate with each other by doing the docker ps command:

1
$ docker ps

Get the ids or names of the containers from that list.

In my case I needed a container running jenkins to be able to communicate with a container running artifactory:

CONTAINER ID IMAGE COMMAND CREATED STATUS PORTS NAME
16ec3d7051dd docker.bintray.io/jfrog/artifactory-oss:latest “/entrypoint-artifact” 42 hours ago Up 19 hours 0.0.0.0:8081->8081/tcp artifactory
2387b9d5e4df jenkins/jenkins:lts “/sbin/tini — /usr/l” 4 days ago Up 4 days 0.0.0.0:8080->8080/tcp, 0.0.0.0:50000->50000/tcp tender_perlman

So I took the ids of the two containers: 16ec3d7051dd and 2387b9d5e4df.

Then you need to add those containers to your newly created custom user network:

1
$ docker network connect mynet 16ec3d7051dd
1
$ docker network connect mynet 2387b9d5e4df

The syntax is:

$ docker network connect [yournetworkname] [yourcontainerid]

Inspect the docker network again

If you run your inspect command again:

1
$ docker network inspect mynet

You should now see your newly connected containers:

1
2
3
4
5
6
7
8
9
10
11
12
13
14
15
16
17
18
...
"Containers": {
"16ec3d7051ddbe58f6984d83e4d099390efa22fafd44d70bd843fb99d75dcd0f": {
"Name": "artifactory",
"EndpointID": "3630e109771441c422fc99a616f0888463a02ea3afc21ab5b60719cdd2b08729",
"MacAddress": "02:42:ac:11:00:02",
"IPv4Address": "172.17.0.2/16",
"IPv6Address": ""
},
"2387b9d5e4dfb1073c8db90052fb9a4692fa227c55441163b08de64eddc27955": {
"Name": "tender_perlman",
"EndpointID": "fe4d002c5497339cc9117a7a3d997a1e57fedb171a93b25d4fa34c34788cfa3a",
"MacAddress": "02:42:ac:11:00:03",
"IPv4Address": "172.17.0.3/16",
"IPv6Address": ""
}
},
...

Now you have achieved your goal to get your docker containers to communicate.

Use curl to check your containers can communicate

In the response from the inspect command you should see your containers each have an “IPv4Address”.

Copy just the IP.

You can now use the docker exec command to test you can ping the other container:

1
$ docker exec -it  16ec3d7051dd ping 172.17.0.3

And you should see:

PING 172.17.0.3 (172.17.0.3): 56 data bytes
64 bytes from 172.17.0.3: icmp_seq=0 ttl=64 time=0.122 ms
64 bytes from 172.17.0.3: icmp_seq=1 ttl=64 time=0.122 ms
64 bytes from 172.17.0.3: icmp_seq=2 ttl=64 time=0.107 ms

Yay!

If you don’t see that, just check your details, use the correct container id/name. Use the correct ip (which you get by copying the IPv4Address from the “docker network inspect mynet” command you ran).

That was a quick overview on one of the ways to get docker containers to communicate.


Quickview: A quick es6 Classes Overview

I keep meaning to put together quickviews of languages I use, almost like cheatsheets, but like a pocket guide overview of language syntax and uses. I recently brushed up on es6 classes.

So here’s my first attempt at a quickview: es6 classes

Basics

Constructors

1
2
3
4
5
class NameOfClass {
    constructor(args) {
        ...
    }
}

Setting class level variables:

Adding parameters to this

1
2
3
4
5
class NameOfClass {
    constructor(name) {
        this.name = name;
    }
}

Methods

Add a method to an es6 class

1
2
3
4
5
6
7
8
9
class NameOfClass {
    constructor(name) {
        this.name = name;
    }

    methodName() {
        return "Hi " + this.name + "!"
    }
}

Default values for arguments

Set a default value for an argument in an es6 class

1
2
3
4
5
...
    constructor(name = "Default") {
        this.name = name;
    }
...

Interpolation

Template strings and interpolating variables (injecting a variable):

You use ${…} and backtick syntax `..`

1
2
3
4
5
6
7
8
9
class NameOfClass {
    constructor(name) {
        this.name = name;
    }

    methodName() {
        return `Hi ${ this.name } !`
    }
}

Note: You can put any kind of valid javascript in the interpolation, including methods.

Advanced

Extending

Extend one class with another class in es6 classes.

1
2
3
class OtherClass extends NameOfClass {
...
}

Call parent class

Referencing the parent class constructor with super(…);

1
2
3
4
5
6
class OtherClass extends NameOfClass {
    constructor(originalClassArg, newClassArg) {
        super(originalClassArg); // You are calling the original class' constructor
        this.newClassArg = newClassArg;
    }
}

Overriding

Extending a parent class method without overriding it:

1
2
3
4
5
6
7
8
9
10
11
12
class OtherClass extends NameOfClass {
    constructor(originalClassArg, newClassArg) {
        super(originalClassArg);
        this.newClassArg = newClassArg;
    }
    methodName() {
        let methodValue = super.methodName();
        ...
        // more logic, do something with methodValue perhaps
        ..
    }
}

References:

Recommended Course:

https://completereactcourse.com

Read more on template strings:

https://hacks.mozilla.org/2015/05/es6-in-depth-template-strings-2/
https://developers.google.com/web/updates/2015/01/ES6-Template-Strings

A simple git subtree tutorial

Here is a quick overview on how to create a git subtree.

I created two public repos to play around with:

https://github.com/CariZa/testing-subtrees-main-repo
https://github.com/CariZa/testing-subtrees-sub-repo

Repository inception

Normally you would use subtrees to pull in a repo into another repo. You would have a “parent” repo that would create a subtree inside of it which basically pulled in the code of another repo.

Use this command in your terminal to see the subtree commands:

$ git subtree -h

Using subtrees to isolate code

What I tried to do is mock a working development environment with source files, and then move just the built “dist” folder into another repo for isolated use.

Empty parent repo (testing-subtrees-main-repo):

This could be where you have your src files and then where you have your dist folder after it builds. You may then want to pull the dist folder into another repo so certain users/systems only have access to dist files.

Repo:

https://github.com/CariZa/testing-subtrees-main-repo

Created a few empty folders to mimic a complex project structure

$ mkdir dist
$ mkdir src
$ mkdir someotherstuff

Add a mock final index.html in dist:

$ touch dist/index.html
$ echo “Hello World” > dist/index.html;

Push updates to parent repo:

$ git add .
$ git commit -am “Added some test folders and file”
$ git push origin master

Turn dist/ into a subtree on a second repo.

Empty sub repo (testing-subtrees-sub-repo):

Sub Repo:

https://github.com/CariZa/testing-subtrees-sub-repo

Cloned the second repo and navigated to the root of that project and added the main repo’s /dist folder to this repo. The “prefix” is basically the folder you want to pull into your repo.

$ git subtree add –prefix=dist https://github.com/CariZa/testing-subtrees-main-repo master

This pulls down just the “dist” folder from “testing-subtrees-main-repo”, in this case it created a dist folder and put the dist folder inside that folder.

Make a change to the sub repo, commit the change, and push it.

$ vi dist/dist/index.html;

Then commit the change

$ git commit -am “Updated text”

Then push the commited change back to the parent:

$ git subtree push –prefix=dist [email protected]:CariZa/testing-subtrees-main-repo.git master

Go to the main repo and pull latest changes and you should see the same change in the main repo.

You don’t need to do anything fancy in the main repo. You should just need to run the normal “git pull origin master” to get the changes.