Run docker images locally with minikube

Building docker images locally and running them on minikube locally

I’d like to share 2 tricks with you for locally testing docker images.

This post is docker focused.

Trick 1:

docker-compose

Pre requisites:

Lean on docker-compose for your local building and tagging of images.

When you think docker-compose you’re probably thinking that you can run your images locally as containers and test them locally.

However docker-compose can also be very useful to build and tag images locally:

Example:

Create a file called: Dockerfile

Add the following contents to the file:

1
2
FROM nginx:latest
EXPOSE 80

That’s it, we’ll test using this simple nginx image.

Create a file called: docker-compose.yaml

Add the following contents to the file:

1
2
3
4
5
6
7
version: "3.9"
services:
  nginx:
    image: localtest:v0.0.1
    build: .
    ports:
      - "80:80"

Run with docker-compose

1
$ docker-compose up -d

You can check that your container is running:

1
$ docker ps

Now check your images

1
$ docker images

You should now see your image built and tagged and available locally:

1
2
3
REPOSITORY   TAG       IMAGE ID         CREATED          SIZE
localtest       v0.0.1    a1dcd6663272   xxx        133MB
nginx           latest    6084105296a9   xxx             133MB

Now you can view this in your browser:

Go to: http://localhost:80

Trick 2:

minikube

Pre requisites:

Running this locally built image on minikube.

Let’s get your local environment ready to run the image on minikube.

Make sure your minikube is running:

1
$ minikube status

Run this command

1
$ eval $(minikube docker-env)

Run the container

1
$ kubectl run localtest --image=localtest:v0.0.1 --image-pull-policy=Never

View pods:

1
$ kubectl get pods

You should see your pod creating and running:

1
2
NAME        READY   STATUS              RESTARTS   AGE
localtest   0/1     ContainerCreating   0          4s
1
2
NAME        READY   STATUS    RESTARTS   AGE
localtest   1/1     Running   0          27s

If you don’t see that, don’t forget to check you ran “eval $(minikube docker-env)”.

Can you create a deployment.yaml file and run it? Sure! Just add the imagePullPolicy as Never:

Create a file called: deployment.yaml

Add the following contents to the file:

1
2
3
4
5
6
7
8
9
10
11
12
13
14
15
16
17
18
19
20
21
22
apiVersion: apps/v1
kind: Deployment
metadata:
  labels:
    app: localtest
  name: localtest
spec:
  replicas: 1
  selector:
    matchLabels:
      app: localtest
  template:
    metadata:
      labels:
        app: localtest
    spec:
      containers:
      - image: localtest:v0.0.1
        name: localtest
        imagePullPolicy: Never
        ports:
        - containerPort: 80

Create the deployment on minikube (remember to check you’re connected to your minikube cluster):

1
$ kubectl apply -f deployment.yaml
1
$ kubectl get deployment,pod
1
2
3
4
5
6
NAME                        READY   UP-TO-DATE   AVAILABLE   AGE
deployment.apps/localtest   1/1     1            1           63s

NAME                             READY   STATUS    RESTARTS   AGE
pod/localtest                    1/1     Running   0          14m
pod/localtest-55888c9fc7-j8mkx   1/1     Running   0          63s

Your pod will have a different name to “localtest-6c755dd5d-m4g5l“, remember to copy your pod and replace this value with your pod’s value.

You can test your newly deployed container:

1
$ kubectl port-forward localtest-6c755dd5d-m4g5l 8080:80

Except this time we’ve portforwarded to port 8080

Go to: http://localhost:8080

(This was a bonus tip ^ you can test pods with port-forward without a service).

References:

Some other references

https://minikube.sigs.k8s.io/docs/commands/docker-env/

https://kubernetes.io/docs/concepts/containers/images/#updating-images

https://medium.com/bb-tutorials-and-thoughts/how-to-use-own-local-doker-images-with-minikube-2c1ed0b0968

Kubernetes and Kong with a Kong Dashboard local

I quickly threw this together just to see if I could get it working on my local machine using docker for mac and kubernetes.

It’s pretty rough, but just putting it here in case anyone needs the same info I pulled together.

This is for local testing with NodePort, not for production or cloud use.
I also used postgres.

Kong kubernetes setup documentation here:

https://docs.konghq.com/install/kubernetes/

Steps to set up kong locally using kubernetes and docker for mac

Enable kubernetes with docker for mac

  • Click on docker preferences
  • Click on the Kubernetes tab
  • Select enable kubernetes checkbox and click on the kubernetes radio button

Note: Make sure kubernetes has access to internet, if it does not start up, check internet connection. If you run on a VPN that has strict security firewalls, that might be preventing kubernetes from installing.

Update type to NodePort

In order for kong to run locally you need to update the type from LoadBalancer to NodePort.

Also make sure the kong version you are using is supported by the kong dashboard image. At the time of writing this only kong version under 0.14 are supported. So I updated the version of kong to 0.13 in the yaml scripts.

Updated kong tag to 0.13

Yaml files

Grab the yaml files from here:

https://github.com/CariZa/kubernetes-kong-with-dashboard

Commands:

1
2
3
4
5
kubectl create -f postgres.yaml    

kubectl create -f kong_postgres.yaml

kubectl create -f kong_migration_postgres.yaml

Check the service ip for

1
kubectl get svc

Copy the ip of the kong-admin service and paste it in kong_dashboard.yml as an “args” value, eg:

When you run “$ kubectl get service” you might get this response:

1
2
3
4
    NAME               TYPE        CLUSTER-IP       EXTERNAL-IP   PORT(S)          AGE
    ...
    kong-admin         NodePort    10.101.71.20     <none>        8001:30916/TCP   46m
    ...

What you want to take is the CLUSTER-IP and the first part of the PORT(S)

1
10.97.55.180:8001

You will add it in the kong_dashboard.yaml file by the args list around line 34:

1
args: ["start", "--kong-url", "http://10.101.71.20:8001"]

Then create the kong-dashboard:

1
kubectl create -f kong_dashboard.yml

To check if your dashboard runs correctly check the logs.

First get the full pod name for kong-dashboard:

1
kubectl get pods

It will be something like **kong-dashboard-86dfddcfdf-qgnhl**

Then check the logs:

1
kubectl logs [pod-name]

eg

1
kubectl logs kong-dashboard-86dfddcfdf-qgnhl

You should see

1
2
3
4
5
    Connecting to Kong on http://10.101.71.20:8001 ...
    Connected to Kong on http://10.101.71.20:8001.
    Kong version is 0.13.1
    Starting Kong Dashboard on port 8080
    Kong Dashboard has started on port 8080

If you only see

1
    Connecting to Kong on http://10.101.71.20:8001

It might still be starting up or your internal kong-admin url could be incorrect. Remember the url is the kubernetes internal url.

Test the dashboard works

You should be able to access your kong-dashboard using the service port:

1
kubectl get service

Grab the port by the kong-dashboard service, it will be the second port:

1
2
3
4
NAME               TYPE        CLUSTER-IP       EXTERNAL-IP   PORT(S)          AGE
...
kong-dashboard     NodePort    10.97.55.180     <none>        8080:30719/TCP   1h
...

In this case the port value is 30719

So the url will be:

http://localhost:30719

Note

This is for local testing with NodePort, not for production or cloud use.

Screenshots

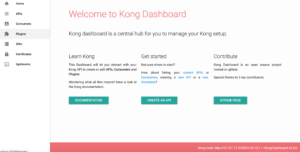
This is what I a see on my side at the date of publication:

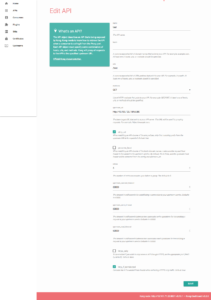
I added a test api entry, pointed to a service I was running on kubernetes:

This is the settings I added for the test:

I got the url but checking the service value:

1
kubernetes get service

I get the values:

1
hello-kubernetes   NodePort    10.106.125.184   <none>        8080:30281/TCP   22h

I used “10.106.125.184” and “8080” as the “upsteam_url”

And I could then access the internal route using the kong-proxy ip and the path I set “/test”

Eg:

http://localhost:32246/test

localhost:32246 -> Kong Proxy url
/test -> The path I told the kong_dashboard to use and redirect to the internal url “10.106.125.184:8080”