I often need to ssh onto a linux server from windows. Putty offers this ability. It is quick and easy to use. The only obstacle has been loggin in to the server each time. Below is the instructions to let putty automatically log you in and on to a server.
Download putty
You need to use Putty on windows to ssh into a server, use the following link to download putty.exe
http://www.chiark.greenend.org.uk/~sgtatham/putty/download.html
Downloading PuttyGen
You need to use PuttyGen to generate a key, use the following link to download puttygen.exe
http://www.chiark.greenend.org.uk/~sgtatham/putty/download.html
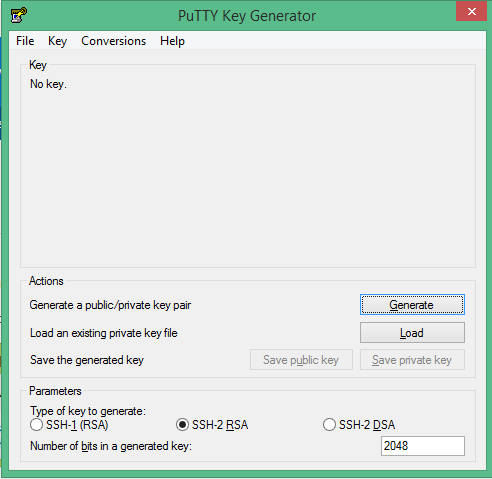
Use PuttyGen to generate an ssh key for windows
Open PuttyGen and generate a key by clicking the “Generate” button. Move your mouse around to generate the key.

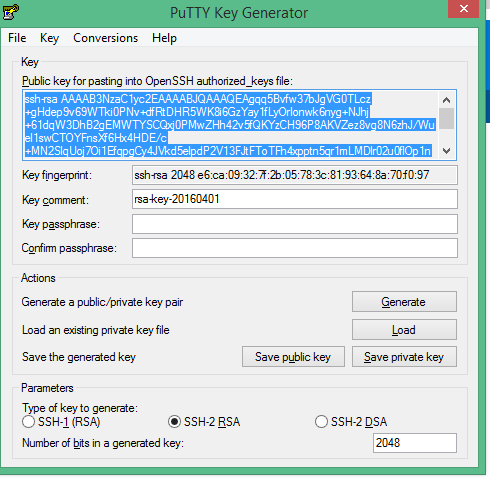
Then you can click “Save public key” and save you public key somewhere safe. Click “Save private key” and save if somewhere save.

Note the Parameter “Type of key to generate” can be se to SSH-2 RSA and the Number of bits to 2048.
Copy the ssh key (you will add this to the server). And put it in notepad so you can use it later, after you have followed the below steps.
Set up putty to ssh into a linux server using a windows computer
Open putty
And do the following:
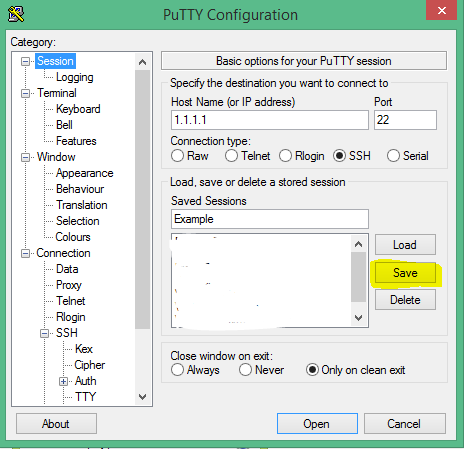
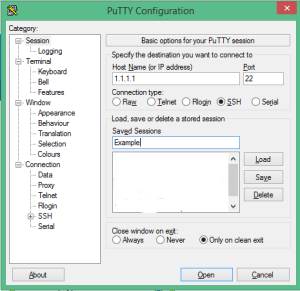
Step 1: Session
On the first screen, “Session” insert your serer’s IP Adress or Host Name. Port is usually 22 by default. And connection type is usually set to ssh. (Don’t click open yet)
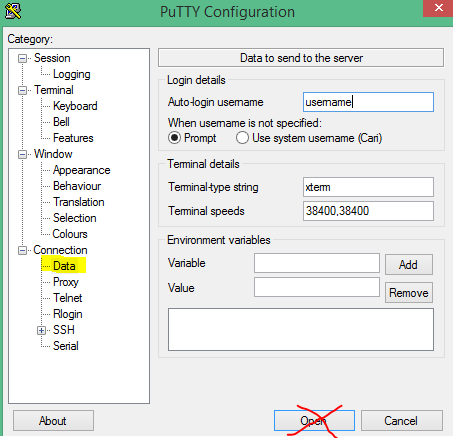
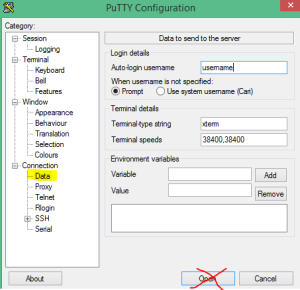
Step 2: Connection- Data
In the login details, insert the Auto-login username field with your server username. Eg “root”. (Don’t click open yet)
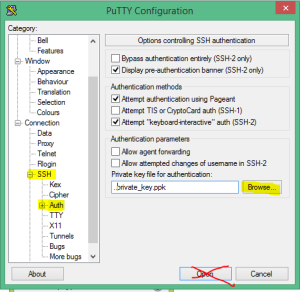
Step 3: Connection – SSH – Auth
In the Auth section browser for the private key file you saved above. It should be a *.ppk file. (Don’t click open yet)
Step 4: Save these settings. Session.
Now that you’ve set it up, make sure to save it so you don’t have to go through this process each time.
Go back to the Session section, and click on the Save button. (Don’t click open yet)

Step 5: Open – Now you can click open
Once you are done setting it up, click “Open”. This will open a connection with the server in a new console window.
Add the ssh key to the server
Once you have a connection with the server you can type the following command:
sudo nano ~/.ssh/authorized_keys
Paste the full key you copied in a new line in this file.
ssh-rsa ….
If there are existing keys don’t replace those, just add to a new line.
Then ctr + X. And insert “Y” to save.
Check you have saved the above steps:
To exit the server connection click Ctrl + D. And this will close the window.
Then open putty again, load your server entry you just made, and click open.
You should now be automatically logged in.